HTML
Hypertext Markup Language (aka HTML) is the most fundamental language used on the Web. With it, we add information into documents (ie. the pages you see in your browser).
HTML is a semantic language, which means HTML is the language we use to add text and images, HTML does not have the ability to style your pages, add cool effects, or make animations, we use other languages such as CSS and JavaScript (that we'll be looking at through the week) to achieve that!
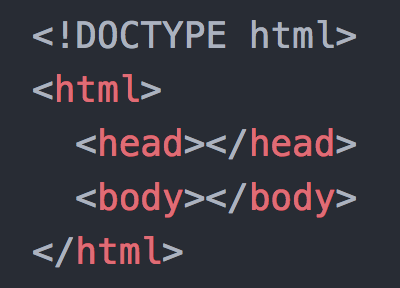
Anatomy of a Webpage (aka the Skeleton)
<!DOCTYPE html>
<html>
  <head>
  </head>
  <body>
  </body>
</html>
A web page is made up of 3 major sections:
<html></html>Wraps around everything else.<head>&<body>must be _nested _inside of these tags<head></head>You don’t see the content in here, but this is where you define rules for the page, like SEO (search engine optimization - ie. how high you rank on Google), and link your CSS file.<body></body>Everything that you want to be visible on your webpage goes in between these tags
Tags define elements
Tags look like<this>and they have meaning. A couple quick examples of tags are<p>which means "paragraph" and<h1>means a "first level heading". Typically the tag is a short form for the word it represents, and thankfully they're based in English!
Most tags need an accompanying closing tag, for example</p>or</h1>after the content that's inside the opening tag.
Remember, HTML is a semantic language which means it's important to use the right kind of tag to dictate the content that's inside of it, use your judgement when it comes to the tag that you choose, and if you're not sure, ask for clarification - it's not always obvious!
Nesting
We indent our code when that content is _inside _another element (between opening and closing tags) so that it's easy to understand what code is inside other code.
In this example, our <head></head> elements and <body></body are nested inside of our <html></html> elements. Nesting is important when writing code because it helps you catch problems early - you create a hierarchy of elements and you can usually see when you might have forgotten a closing tag.
Attributes
Attributes follow a key-value pair style, and allow us to add additional information to our HTML elements. We can add as many attributes as we need, depending on what we're trying to achieve. You'll find examples of common attributes in the HTML Cheatsheet. They are always added within the opening tag and follow the same pattern:

Sometimes attributes are "mandatory", for instance, the example above shows the href attribute which belongs to our anchor <a> tag. Our <a> tag won't function without the href attribute because it tells the anchor tag what website to go to when it is clicked.
IDs
ID's are an attribute we can optionally give to an HTML element. ID's must be unique to every element, while all your elements could have an ID attached to them, none of them can share the same value.
ID's are useful for uniquely identifying an element which can then be targeted using CSS, or can be used as a value passed to an <a href="ID"> in single-page websites (or multi-page websites) to link to a specific part of a page.
Remember, an ID's value can only be used once per page.
Classes
Classes are an attribute we can optionally give to an HTML element. Unlike ID's, a class can be used on as many different elements as you like. Classes are especially useful later when we start using CSS to style multiple elements the same way.
